How to Build a Retaining Wall on a Slope (2025 Guide)

How to Build a Retaining Wall on a Slope (2025 Guide)
If you’ve got a sloped yard in Dallas, you’ve probably already run into the challenges: soil erosion, unusable space, drainage issues, or collapsing garden beds. A retaining wall can solve all of those problems—but only if it’s built the right way.
We cover the creative side of this topic in our 2025 Retaining Wall Ideas article, where you’ll find design inspiration and a clear breakdown of what retaining walls actually do. But here, we’re digging into the construction side of things.
At Supreme Landscaping and Fencing, we’ve spent over a decade designing and building structurally sound retaining walls across Dallas’s toughest terrains. With 500+ projects completed, we’ve seen what works, what doesn’t, and what causes walls to fail just a few seasons in.
This guide is built on that real-world experience. If you're thinking about tackling a sloped retaining wall yourself—or just want to understand what goes into it—stick around. You’ll walk away with a blueprint that’s built to last.
What You Need to Know Before You Start
Before you pick up a shovel, here’s what needs to be crystal clear:
Understand Your Slope: You’ll need to measure the grade (rise over run) to know how steep the area is. This helps determine how high your wall will need to be and whether you’ll need one continuous wall, stepped tiers, or integrated stairs.
Know the Wall’s Purpose: Are you building to prevent erosion, flatten a space for a patio, or just improve curb appeal? The design approach changes depending on the goal.
Know When to Call a Pro: In Dallas, any wall over 4 feet high (measured from the base) typically requires an engineer’s sign-off and city permitting. If your wall is holding back significant soil or near structures, hiring a pro like Supreme is your safest route.
Choosing the Right Materials for Sloped Retaining Walls
Not every wall is built the same, especially on a slope. Here’s how to weigh your options:
Concrete Blocks
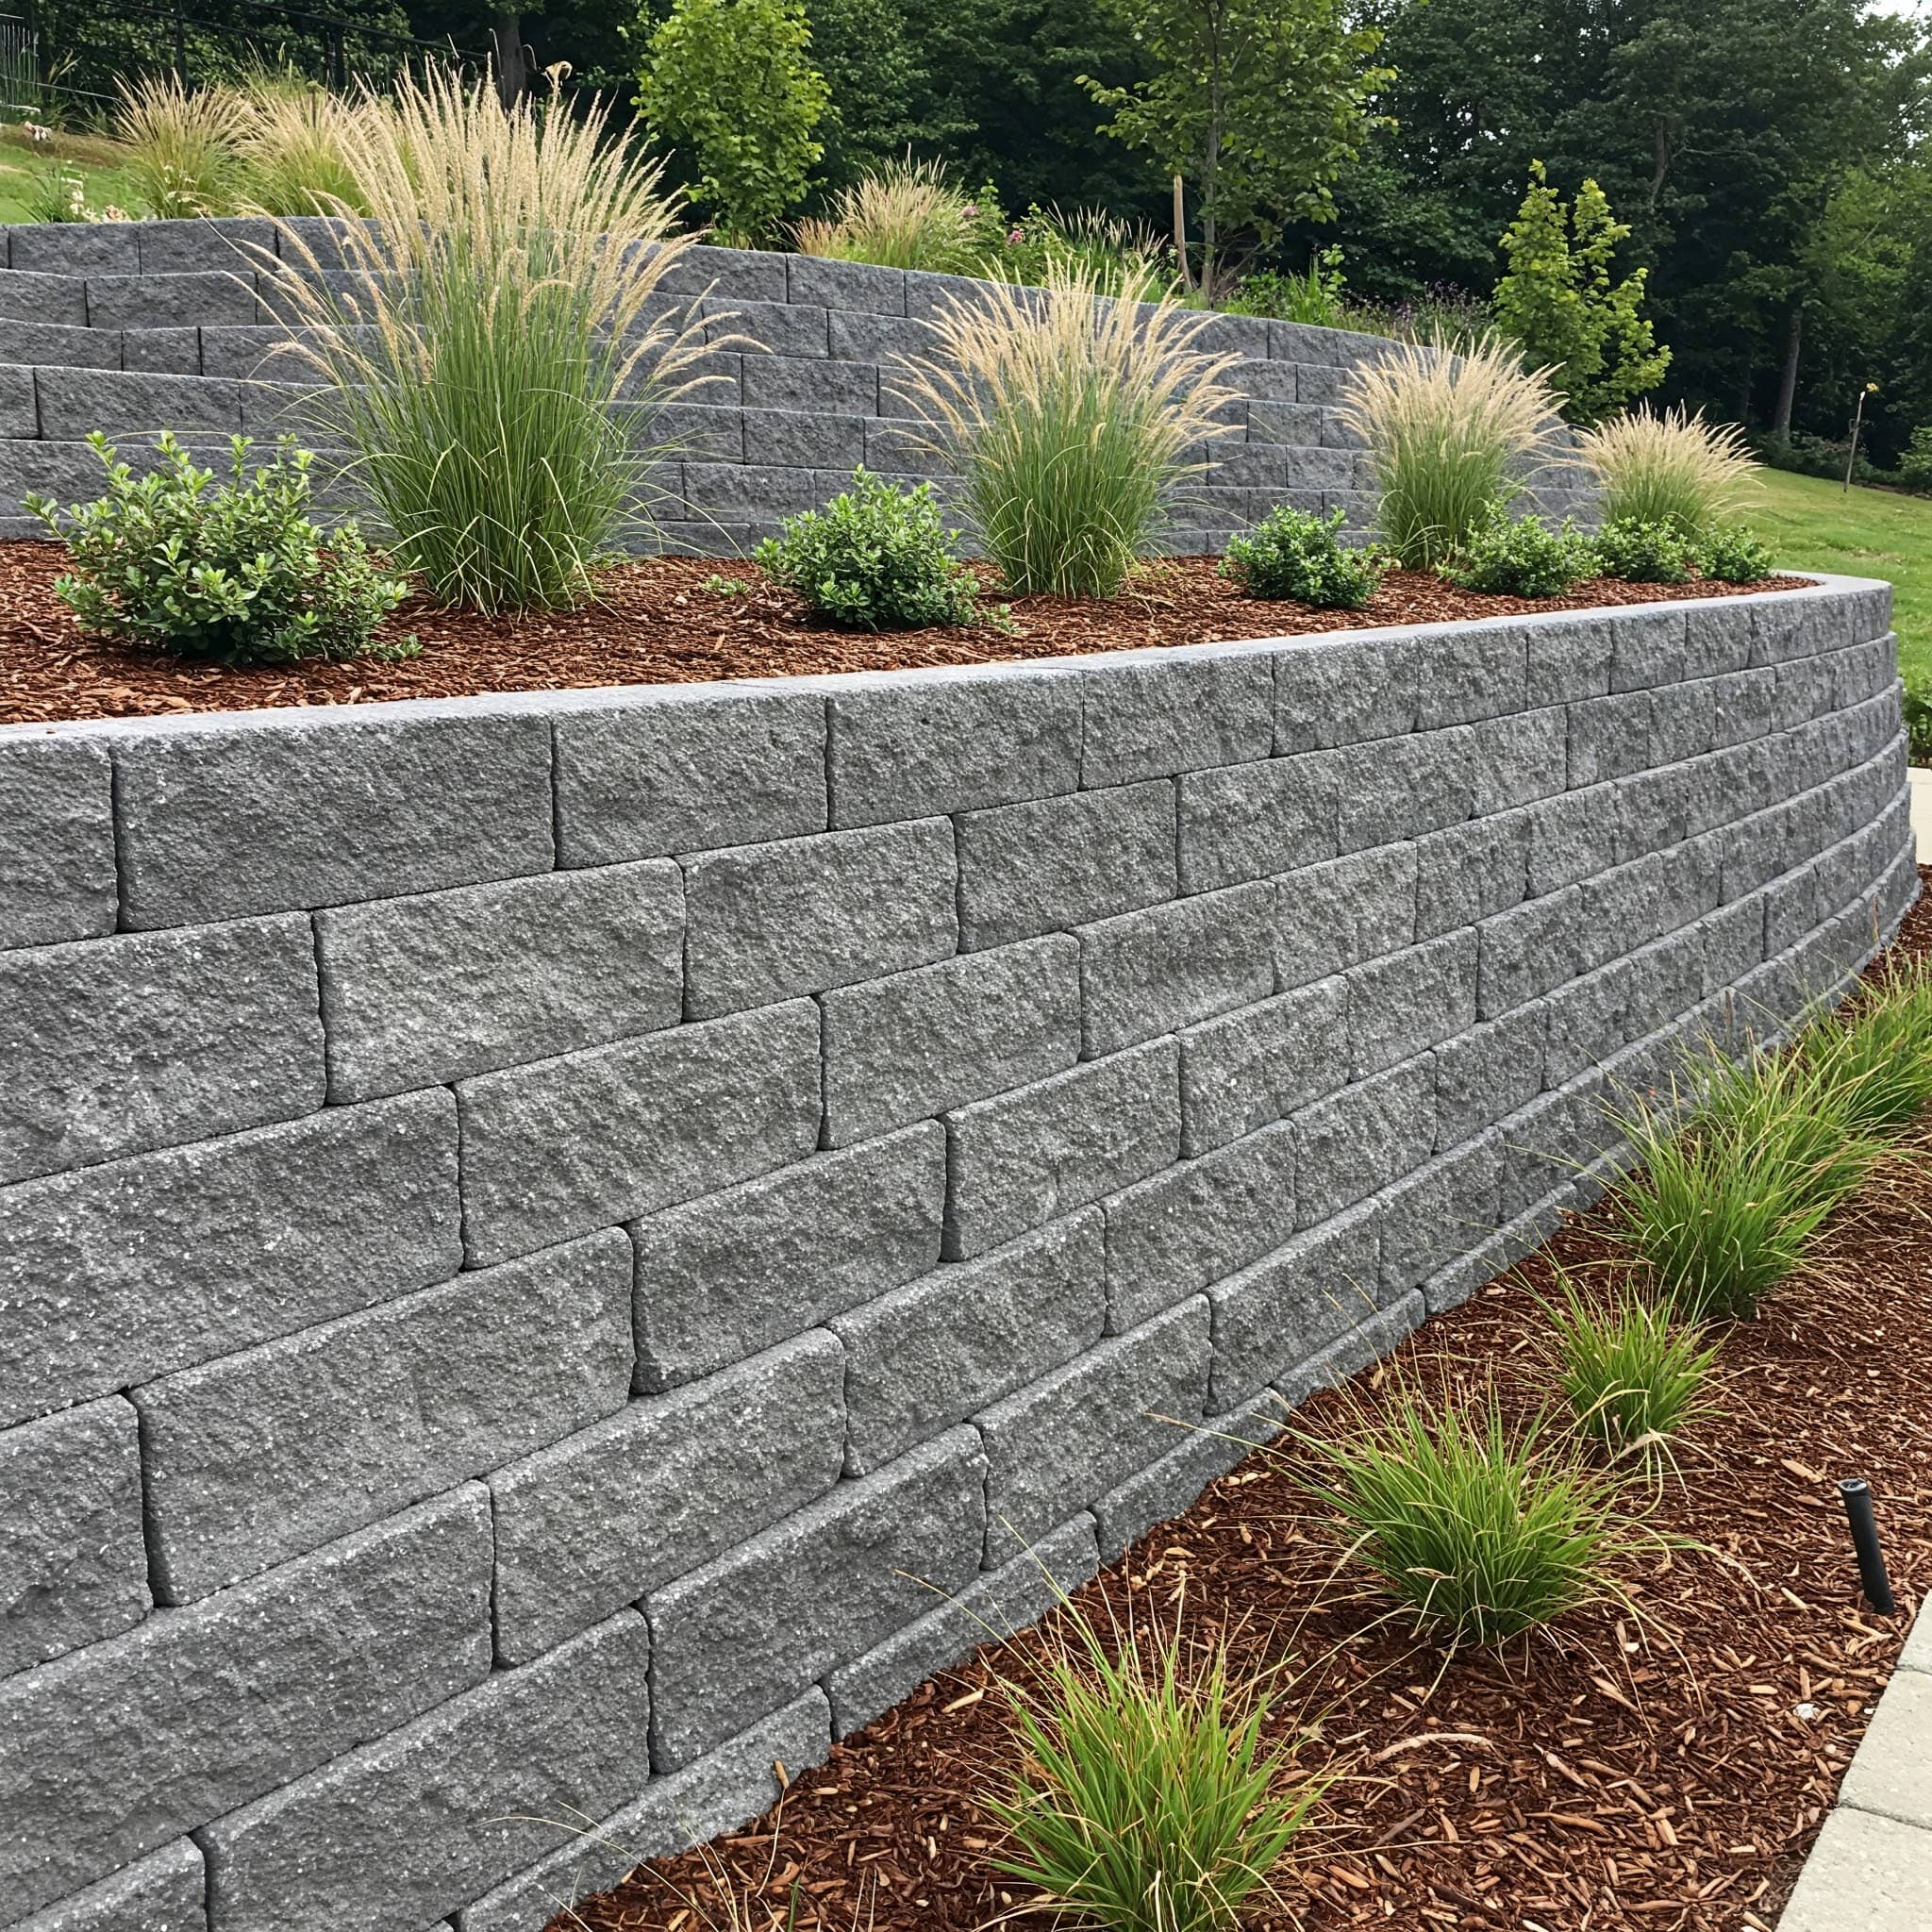
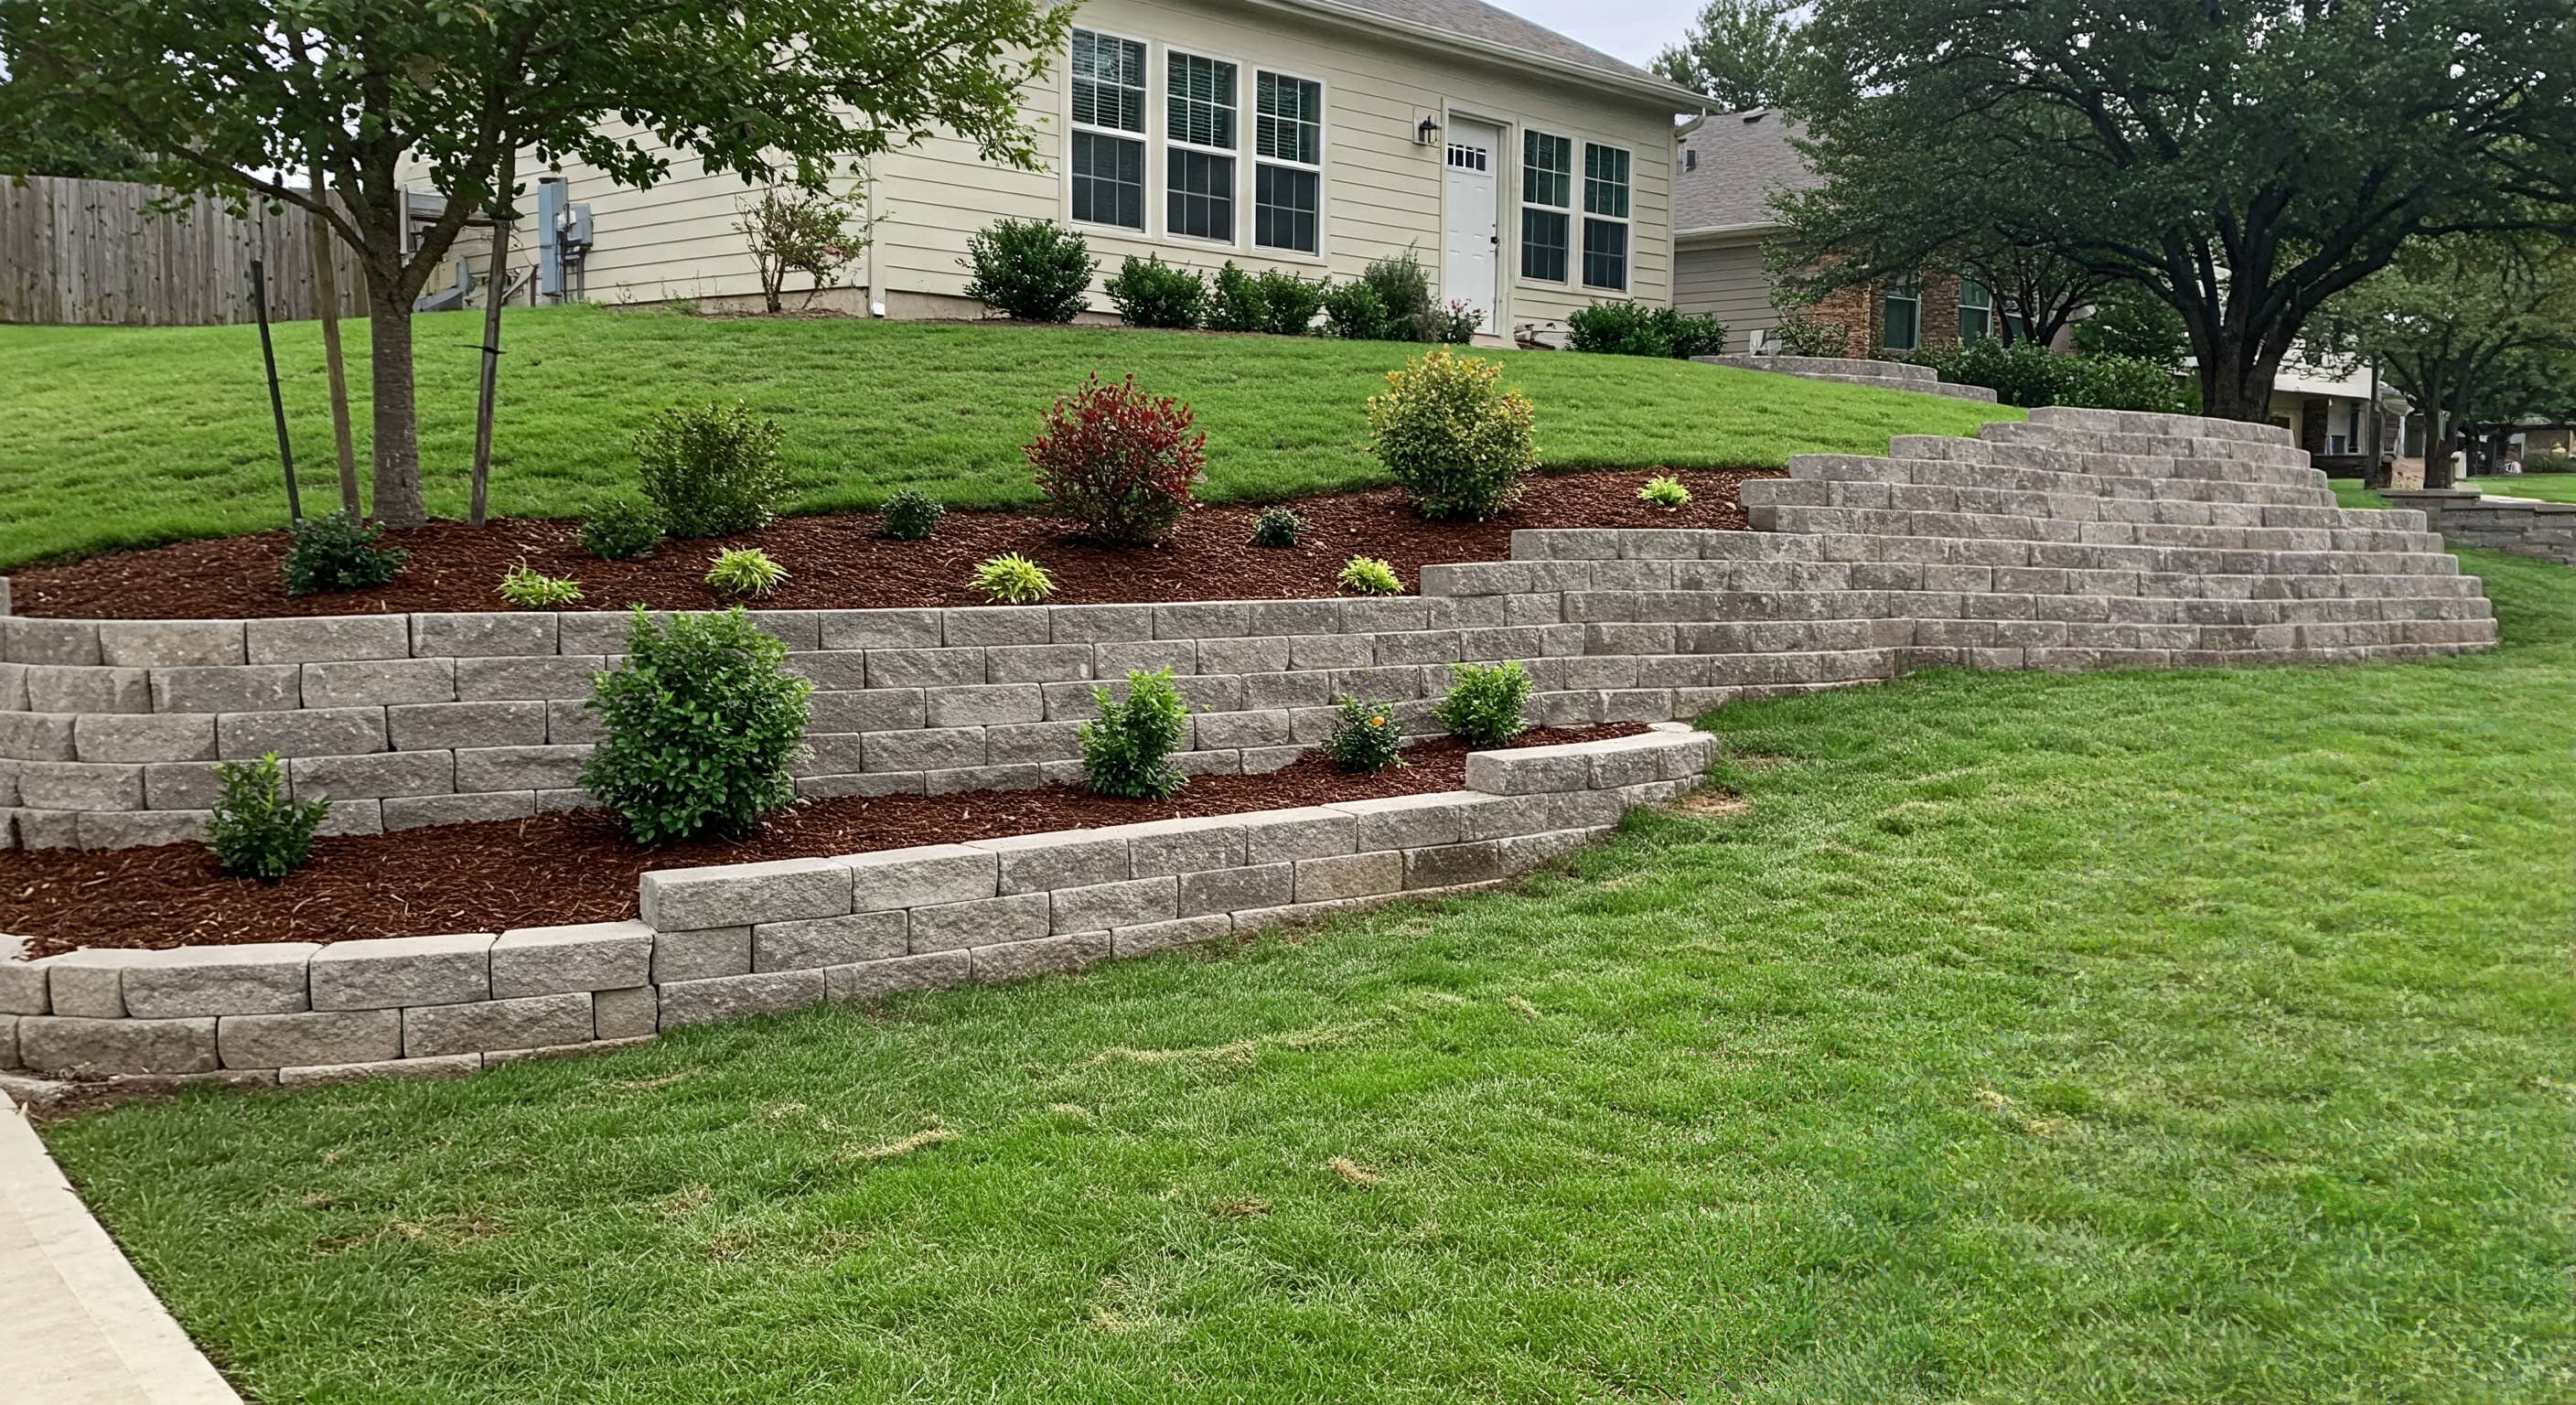
Concrete blocks are one of the most popular choices for retaining walls on slopes—and for good reason. These are pre-formed, interlocking blocks specifically engineered to retain soil without the need for mortar. They’re modular, relatively lightweight, and easy to stagger in a “step-up” pattern to follow the natural grade of a hill or slope.
Why They Work on Slopes: Segmental blocks are ideal for step-by-step elevation changes. Their self-aligning lip or pin systems help the wall stay structurally sound, even as the slope changes. You can build both curved and straight walls with them, and the dry-stack installation allows some flexibility during minor ground movement—important in Dallas’s clay-heavy soil.
Best For:
Walls up to 4 feet (DIY) or taller with reinforcement
Projects where aesthetics + functionality both matter
Quick builds with professional-looking results
Keep in Mind:
Taller walls (over 4') require geogrid reinforcement and professional design
Good drainage behind the wall is critical to avoid pressure buildup
Poured Concrete
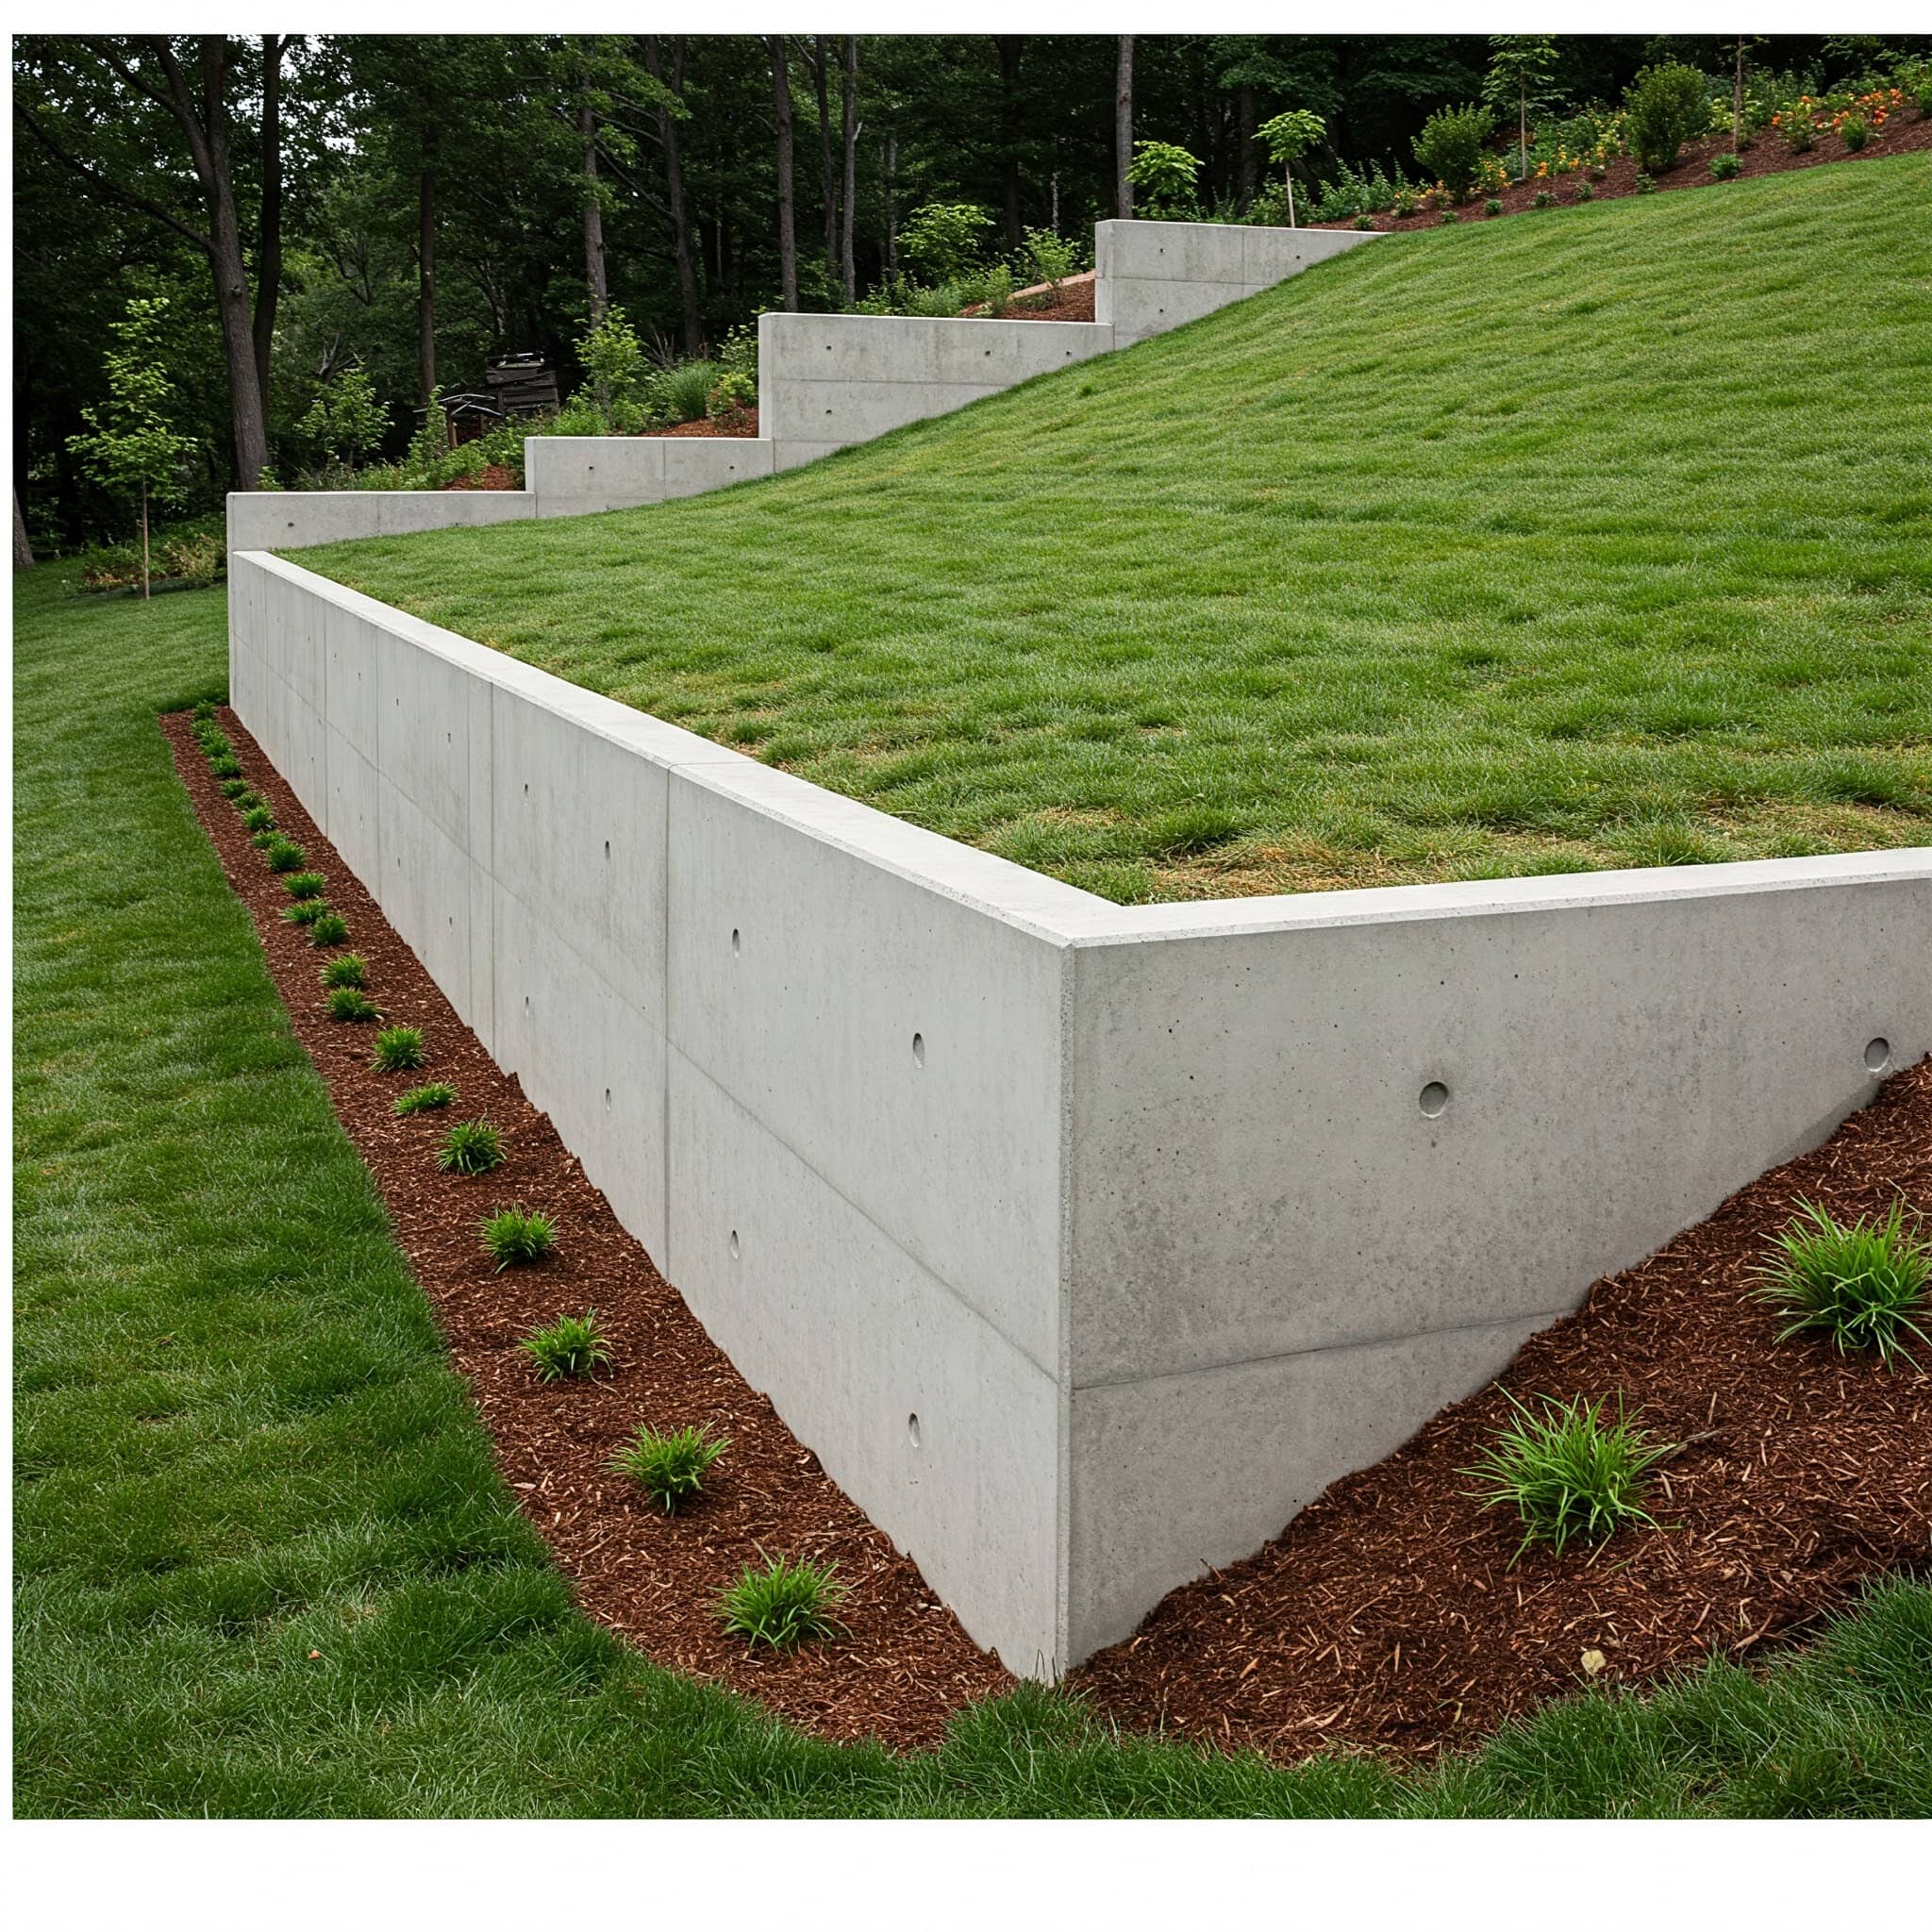
Poured-in-place concrete walls offer the highest structural integrity of any retaining wall material. These are typically installed using formwork and rebar, then filled with concrete to create a monolithic structure. When installed properly, poured walls can withstand significant soil pressure—making them a go-to for high walls, commercial-grade installations, or sites with steep slopes and water management issues.
Why They Work on Slopes: Their single-piece construction means there are no joints to shift or weaken. If drainage and footing are engineered correctly, a poured concrete wall can last 50+ years with minimal maintenance.
Best For:
Tall or highly engineered retaining walls
Clean, modern aesthetics
Maximum strength for steep or heavily loaded slopes
Keep in Mind:
More expensive due to labor, concrete mix, and formwork
Cracks can occur without control joints or proper drainage
Usually requires professional installation and permitting
Natural Stone
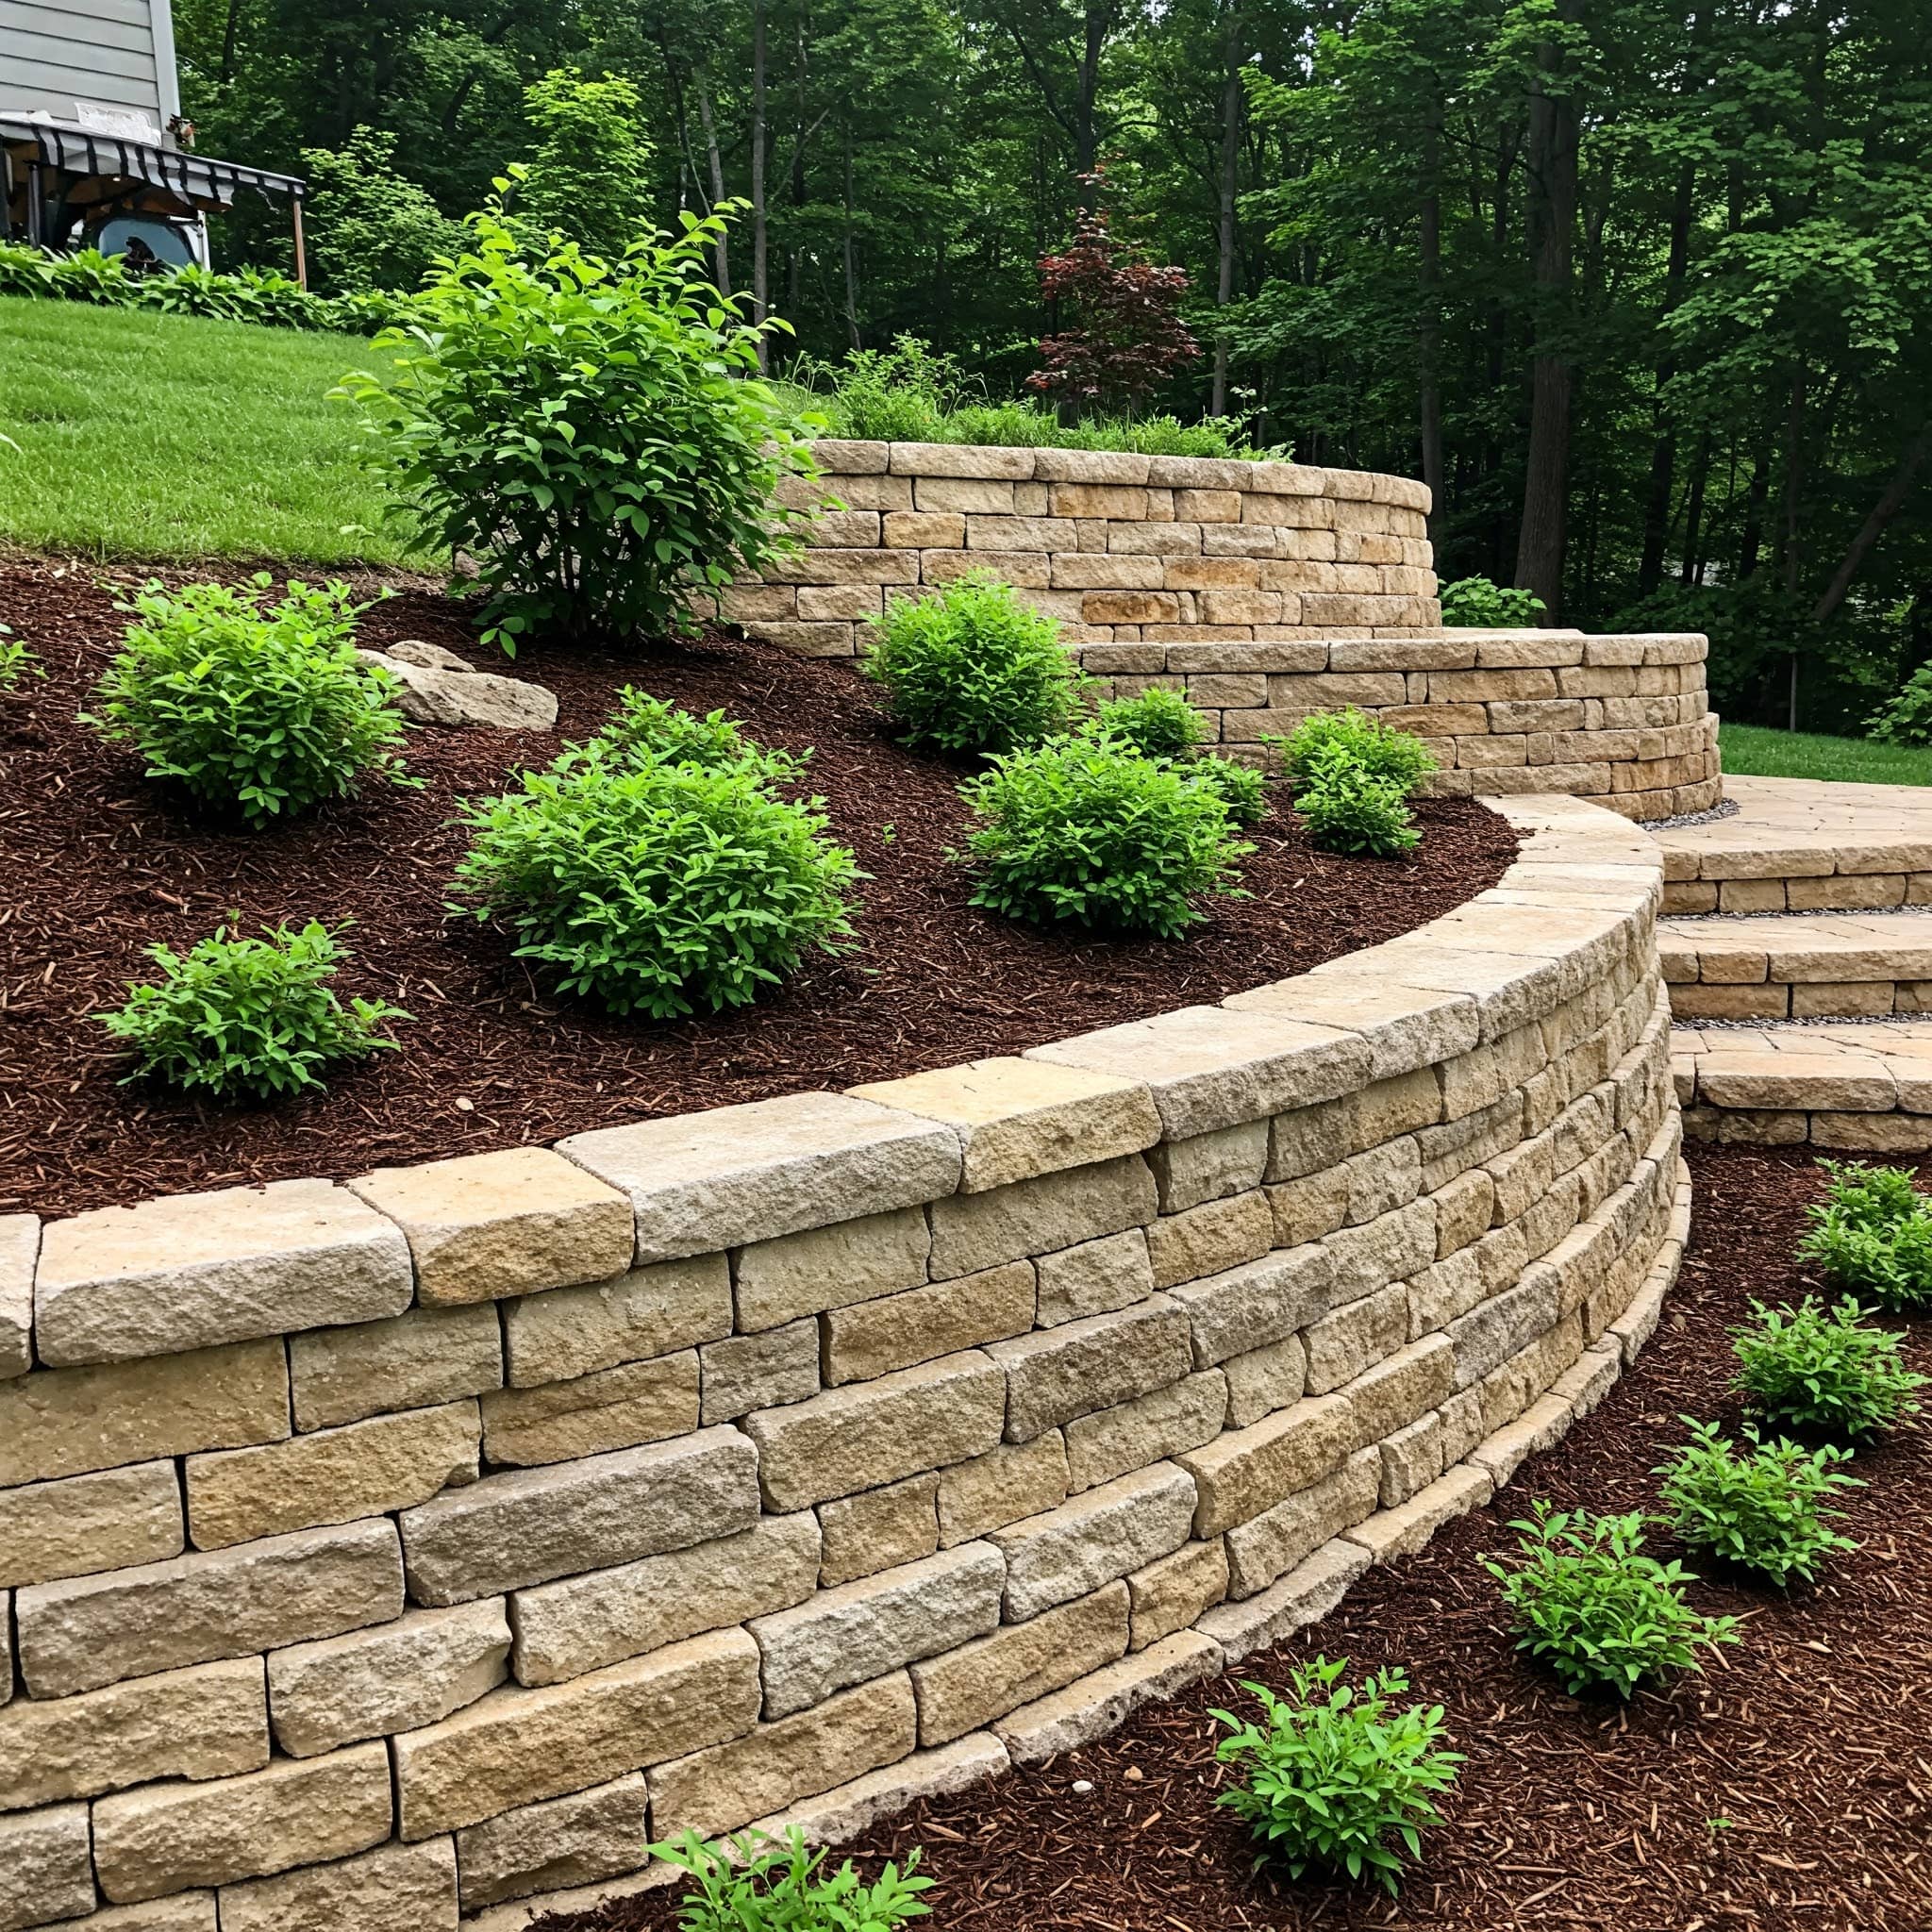
Natural stone offers timeless beauty and durability. When stacked carefully, either dry or with mortar, stone retaining walls can blend seamlessly into landscapes. While visually striking, they do demand more skill to install—especially on a slope, where consistent wall height and step-backs are harder to achieve.
Why They Work on Slopes: Stone adds weight and structure to hold back soil, and when carefully laid, the irregular shapes can create interlocking strength. On sloped land, these walls can follow curves and natural terrain more organically than rigid forms.
Best For:
Premium residential projects
Decorative walls that also serve a structural function
Properties where aesthetics are a top priority
Keep in Mind:
Expensive due to stone cost and labor
More difficult to reinforce without hidden anchors or mortar
Requires proper drainage and base to avoid shifting
Timber

Timber retaining walls are constructed using pressure-treated wood—usually 6x6 beams or railroad ties—stacked and anchored with rebar or deadman ties into the slope. They’re among the most budget-friendly options, making them popular for quick fixes or small elevation changes.
Why They Work on Slopes: Wood is easy to cut and place along an uneven slope. For short-term use or low-height walls (under 3 feet), they can be a cost-effective and simple option. Installation is fast and doesn’t require special equipment.
Best For:
Short retaining walls (under 3 ft)
Budget-conscious projects
Informal, rustic settings
Keep in Mind:
Shorter lifespan: prone to rot, warping, or insect damage over time
Not ideal for wet or heavily irrigated slopes
Not suitable for walls over 4 feet or those supporting large loads
Geogrid Reinforcement
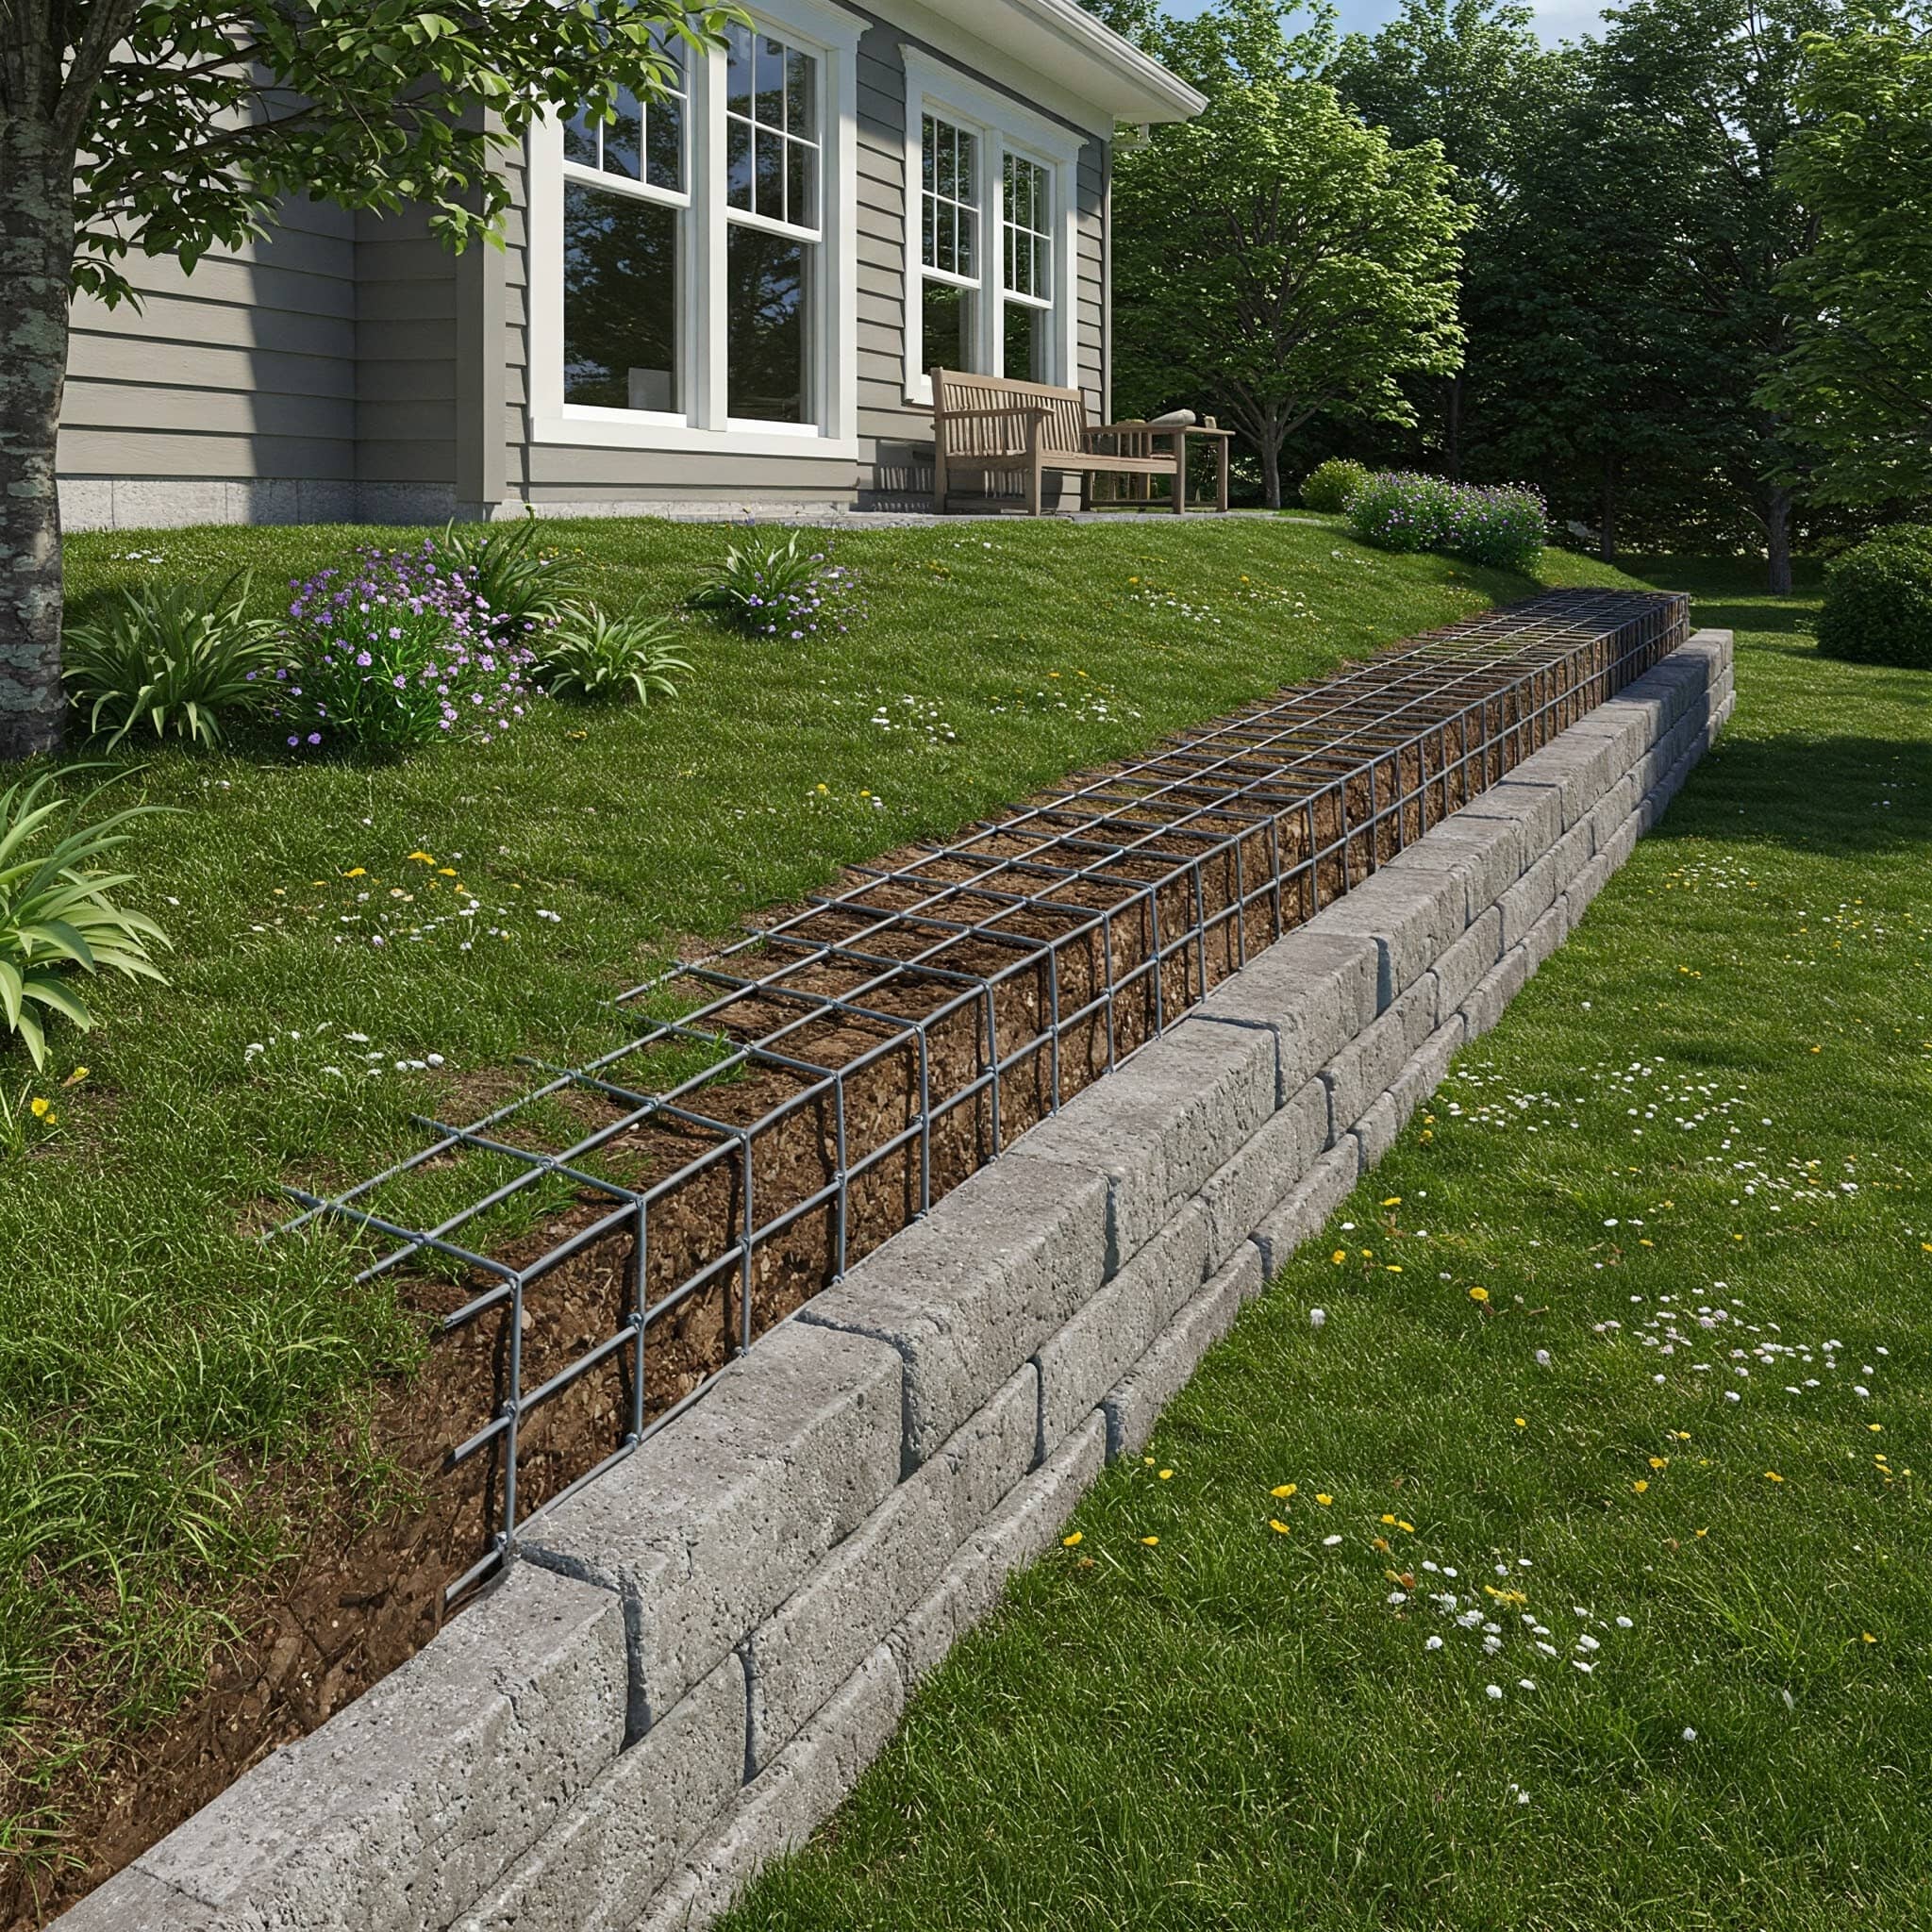
Geogrid is not a wall material but a critical reinforcement system. It’s a synthetic mesh or grid that extends horizontally from behind the wall into the retained soil, interlocking with soil layers to dramatically increase stability. On sloped sites, where lateral earth pressure increases with height and water presence, geogrid is essential for preventing overturning or sliding.
Why It’s Essential for Slopes: Dallas soil shifts seasonally. Geogrid ensures the wall is anchored into the slope itself—not just resting against it. It creates a reinforced soil mass that acts as a unified system, helping walls handle both vertical weight and horizontal pressure.
Best For:
Walls taller than 3–4 feet
Tiered or terraced walls
Retaining structures with surcharge loads (e.g. near patios or driveways)
Keep in Mind:
Needs to be specified based on wall height, slope angle, and soil type
Proper placement and backfill compaction are essential
Typically installed in layers between block courses
Step-by-Step: How to Build a Retaining Wall on a Slope
Step 1: Plan and Mark the Wall Location Before any digging begins, it’s critical to map out the exact path your wall will follow. On a sloped yard, this step determines everything from drainage direction to block alignment. Use stakes and string to outline the wall’s base, following the natural rise of the slope. Most sloped-wall builds use what’s called a “step-up” method—where each section of the wall increases in elevation as you move uphill. Your string lines should stay level (use a line level or laser if available) so you can measure and visualize how the base trench will move up in steps. Proper layout now prevents major issues later, especially when it comes to leveling and drainage alignment.
Step 2: Excavate a Trench Digging the trench correctly is one of the most labor-intensive—but most important—parts of the process. The trench should be 6 to 12 inches deeper than the first course of blocks and at least twice as wide as the blocks themselves. On sloped terrain, this trench won’t be one consistent depth—you’ll need to “step” the trench up as the elevation changes. This means digging the lowest section first and then cutting each new step higher into the hill as you go. Each of these trench sections will hold one level of block and should remain level side-to-side, even as they move uphill. It’s critical that the bottom of the trench is flat, compacted, and cleared of roots or loose soil to prevent settling later on.
Step 3: Add a Compacted Gravel Base Your retaining wall is only as strong as what it sits on. Pour 4 to 6 inches of angular crushed gravel (typically 3/4” minus) into the trench and compact it thoroughly. Use a hand tamper for small walls or a plate compactor for larger builds. The gravel base creates a firm, stable foundation that allows water to drain and reduces the risk of movement caused by soil expansion or erosion. Pay close attention to leveling across the base—any dips or uneven spots will be amplified as you build up. For sloped sites, each step of the gravel base should be individually leveled before moving up to the next.
Step 4: Lay the First Course Begin your wall at the lowest point of the slope, as this will serve as the structural anchor for the rest of the build. Place the first course of blocks directly on the compacted gravel base. This row must be perfectly level in every direction—front to back and side to side. Even small inconsistencies here will compound as the wall gets taller, leading to leaning or bulging. Use a rubber mallet to gently tap blocks into place and a level across the top of every block to ensure alignment. On a slope, you’ll build the first course one section at a time, stepping the base trench upward as you work your way across the hill.
Step 5: Install Drainage Pipe and Backfill Proper drainage is non-negotiable when building a retaining wall on a slope. As you finish the first row (and with each additional course), lay a perforated drain pipe behind the base of the wall. The pipe should slope slightly away from the wall or lead to an outlet (“daylight”) downhill. Surround it with clean gravel—typically 6–12 inches thick—and use filter fabric to prevent soil from clogging the pipe. This system relieves hydrostatic pressure and keeps water from building up behind the wall. As you add each course, backfill the area behind the blocks with gravel, compacting it in layers. Avoid filling with native soil, which retains water and expands over time.
Step 6: Stagger Blocks and Step Up Once the base course is complete, begin stacking the second course by offsetting the joints—just like bricks. This staggered pattern increases structural integrity and helps lock the blocks together. On a slope, you’ll continue the “step-up” method: as the ground rises, you’ll dig and build a new section of gravel base and start a new bottom row, one step higher than the last. Each tier must tie back into the hill with consistent block overlap. After laying each new course, add gravel backfill and compact it thoroughly. Continue this process, carefully following the slope and checking level often, until the wall reaches the desired height.
Step 7: Cap and Finish the Wall With all block courses in place, the final step is to install capstones. These are typically flat, wider units that give the wall a clean, finished edge. Use a high-strength concrete adhesive specifically designed for outdoor masonry applications, applying it to the top of the last row before placing the capstones firmly. Space them evenly and ensure they align with the rest of the wall’s face. Finally, grade the soil behind the wall so that it slopes gently away from the structure, encouraging surface runoff to flow away rather than pool behind the wall. Add mulch, plants, or landscape fabric as needed to stabilize the slope and complete the project.
Common Mistakes to Avoid
Skipping Drainage: This is the #1 cause of wall failure.
Poor Base Prep: If the gravel base isn’t compacted, the wall will shift over time.
No Reinforcement: Taller or tiered walls require geogrid or tie-backs.
Underestimating Soil Movement: Dallas clay expands and contracts with moisture—your wall needs to be built with that in mind.
How Dallas Soil and Weather Impact Retaining Walls
Dallas homes sit on some of the most movement-prone soil in Texas. Clay-rich dirt expands when wet and contracts during dry stretches, creating lateral pressure behind walls. Add in intense rainfall, poor drainage, and the occasional freeze, and it’s clear that a sloped retaining wall here needs more than a standard build.
At Supreme, we design every wall for the soil beneath it, not just the yard above it. That’s how we ensure long-term success.
When to Call in the Pros: Why Dallas Homeowners Choose Supreme
Not every retaining wall needs a contractor. But if your wall is taller than 3–4 feet, supports significant weight, or will serve as a focal point in your outdoor space, it’s time to bring in a team that’s done it all.
Here’s why Dallas trusts Supreme:
10+ years in business
500+ successful projects across residential and commercial properties
Engineering-level builds with true construction experience
Fully permitted and inspected retaining wall systems
Experts in concrete, drainage, and soil stabilization
One-stop team for walls, steps, patios, and fences
We don’t just make walls look good—we make them last.
Let’s Build Something That Lasts
At the end of the day, building a retaining wall on a slope is about solving a real challenge with the right materials, the right prep, and the right plan. That’s where we come in.
Supreme Landscaping and Fencing has been building retaining walls in Dallas for over 10 years. We know the soil, the slope, the drainage issues—and how to build walls that actually last through all of it. Whether you’ve got a full design in mind or just know you’re tired of erosion and wasted space, we’ll walk the property with you, explain your options, and give you straight answers.
We don’t believe in shortcuts or one-size-fits-all fixes. We build each wall like it’s supporting our own home—because that’s what you deserve. If you’re ready to start the conversation, we’d be happy to take a look and talk through what makes sense for your property.
No pressure. No sales pitch. Just expert guidance and quality work that holds up. Let’s build it right.